Awesome is the best way to describe these magical RGB LED cube kits. The Cube:Bit can be assembled using just a screwdriver and within a few minutes you'll have created some stunning lighting and visual effects that you can use for a whole host of things, such as learning about coordinates in 2D and 3D, indications for sensory events from your SBC, decorative lighting, the possibilities are endless.
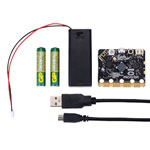
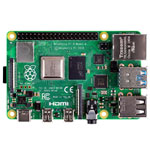
The Cube:Bits are made out of pre-assembled slices that have neopixel LEDs on both sides, making a 5x5x5 matrix when assembled. Once assembly is done you have to use the Cube:Bit Base (available separately) to provide power and to connect a controller or to directly connect to a BBC micro:bit or Raspberry Pi Zero (full size Raspberry Pi work fine of course, but don't fit directly without using an extension GPIO cable, or simply 3 female-female jumper cables for 5V, Gnd and GPIO18).
With micro:bit we have written a special Makecode package (see below) that "knows" about the shape of all the cubes and can map from x, y, z coordinates directly to a pixel anywhere in the cube. Write to a whole plane of pixels at once, create a moving rainbow effect in only a few lines. With Raspberry Pi you can use any of the neopixel code already available to drive your Cube:Bit eg. Pimoroni, Adafruit or 4tronix neopixel products.
MakeCode Package for 4tronix Cube:Bit Magical RGB Cubes of Awesome
Helper routines for using the neopixels in the Cube:Bit range of Cubes
Defining the Cube
The first thing you should do is create a Cube object with the required dimensions per side. Use the block:
create cube:bit on pin0 with side <3/4/5/6/7/8>
Then set the brightness to be used from 0 to 255. If this block is not used, then the brightness is set to 40. We strongly recommend keeping this at less than 100. All values sent to the LEDs after this command will be scaled down to fit in this maximum brightness level.
set cube:bit brightness to <0...255>
##Using Cube:Bit Pixels Each pixel can be addressed by using the pixel ID which is a number from 0 to the number of pixels in the cube minus one. eg. a 3x3x3 cube has 27 pixels so the ID can be 0 to 26, 4x4x4 has 64 (ID 0 to 63) and 5x5x5 has 125 (ID 0 to 124)
set pixel color at ID to
The colour value is a number. There are some pre-define colours (eg. Red, Yellow, etc) or you can put in a simple number, or you can define separate Red, Green and Blue values using the map colour block
convert from red, green, blue
If you want to specify the x,y,z position of the pixel then use the mapping block to create the pixel ID
map from x y x
Whenever changing the colour of pixels or clearing them, or rotating them, you will need to display the result afterwards. Use the show changes block for this
show Cube:Bit changes
You can also set a whole plane of pixels to the same colour. eg. set the top slice to blue, or the left side to green. Use the set plane block:
set plan on axis <xy, xz, yz> to <colour>
Let your imagination roam free
No soldering involved
You can stack them, to make a tower as high as you like!
Full RGB - contains every visible colour ever known (black not included)