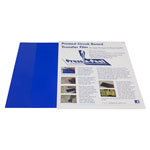
This pack of press-n-peel PCB transfers has been designed so an image of the required PCB can be printed directly onto the film using a photocopier or laser printer. The film is then ironed onto plain copper clad material using a domestic iron and left to cool for a few minutes. The film is then removed leaving the impression of the required circuit. Etching can then be done in the normal fashion.
Supplied in 216 x 279mm (8.5 x 11in.) sheets (letter setting on printers)
A. Hi Gary. Thank you for your question. There is no shelf life on these.
Reviews
Easy product to work with
Reviewed by: Dainius Slavinskas - Wednesday, August 13, 2014
Very good for producing prototype PCBs at home. Clear instructions and directions.
Great product, I can do tiny 100 pin TQFPs with it
Reviewed by: Dan Riches - Monday, March 10, 2014
This product is great! Forget using photolithography at home, it's far too expensive and unless you throw money at it you'll get poor results. Press n Peel on the other hand is fantastic, I can produce and have produced literally hundreds of boards with a 25% loss due to me rushing it. Basically using a decent laser printer set to letter and Diptrace 1.5 in free mode you can quickly knock a pcb out within an hour. I use a polifix block in circular motion to clean the pcb, place it on a flat block of clean wood and place the mirrored print on top with a clean piece of paper on the press n peel to stop it sticking to the iron. Iron it until the traces change to grey which means they've stuck to the copper. Rinse carefully with cold water or leave for a while, it must be cool. Then slowly peel off from the corner, very slowly or it'll fracture the transfer. You can fix tiny errors with an etch resist pen. Now etch it, I use the clear etchant in a homemade acrylic tank, air stone and pump and a fish tank heater set to 32 degrees or max. The etchant must be really warm. Don't be tempted with the cheap rubbish on ebay which is yellow, it does not work at all!